
Sub-Heading 1: Introduction to DIY Garage Door Opener Maintenance
Taking care of your garage door opener is essential for smooth and reliable operation. In this guide, we’ll explore step-by-step instructions on how to clean and maintain a garage door opener yourself, ensuring its longevity and optimal performance.
Sub-Heading 2: Safety Precautions Before DIY Maintenance
Before delving into maintenance tasks, prioritize safety. Disconnect the garage door opener from the power source to avoid accidental activation. Ensure the door is fully closed to prevent it from unexpectedly moving during maintenance. Safety should always be the first consideration in any DIY project.
Sub-Heading 3: Cleaning the Exterior and Interior Components
Dust and debris can accumulate on both the exterior and interior components of the garage door opener. Use a soft, dry cloth or a gentle brush to remove dirt from the motor unit, tracks, and sensors. Be cautious not to damage any delicate parts during the cleaning process.
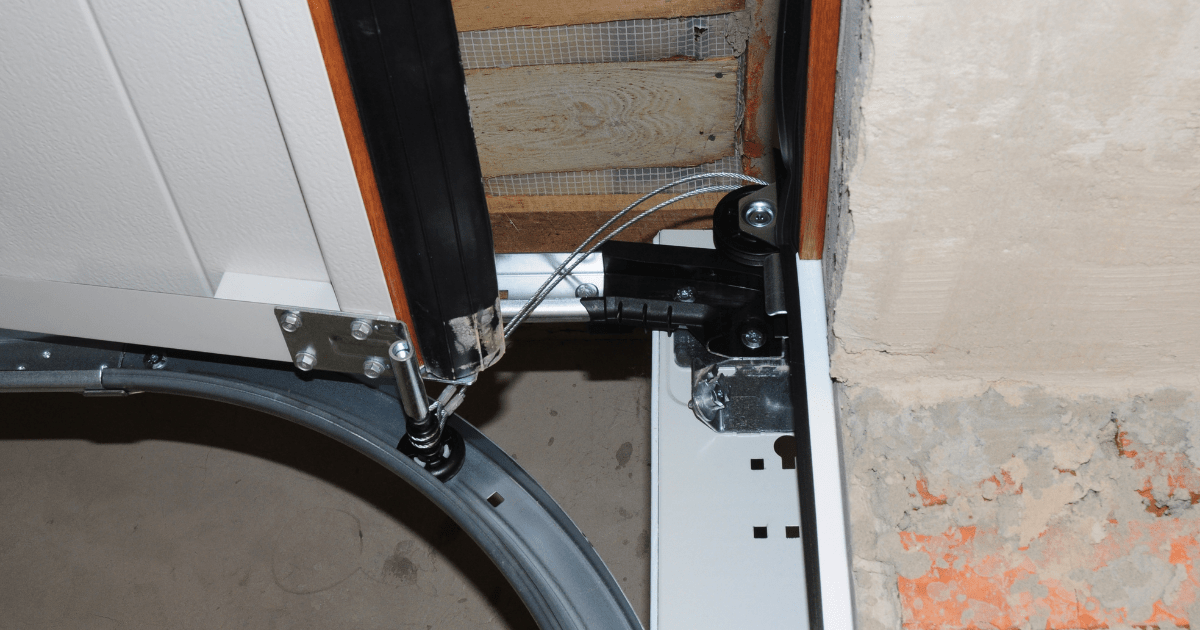
Sub-Heading 4: Lubricating Moving Parts for Smooth Operation
Proper lubrication is crucial for the smooth operation of the garage door opener. Apply a silicone-based lubricant to the rollers, hinges, springs, and the opener’s chain or screw drive. Avoid using grease, as it can attract dirt and debris, potentially causing more harm than good.
Sub-Heading 5: Checking and Tightening Hardware
Regularly inspect the hardware, including bolts, nuts, and screws. Over time, these components can loosen due to the door’s movement. Tighten any loose hardware using the appropriate tools. Pay special attention to the mounting brackets and connections to ensure stability.
Sub-Heading 6: Testing Safety Features and Sensors
Modern garage door openers come equipped with safety features such as sensors that detect obstacles in the door’s path. Test these safety features by placing an object in the door’s path during a close operation. The door should reverse immediately upon detecting the obstruction.
Sub-Heading 7: Adjusting the Opener’s Force Settings
The force settings of the garage door opener dictate how much pressure is exerted during the opening and closing processes. Consult your opener’s manual for instructions on adjusting these settings. Proper adjustment ensures the door operates smoothly without unnecessary force.
Sub-Heading 8: Inspecting and Replacing Weather Stripping
Weather stripping around the garage door helps prevent drafts and the entry of dust and pests. Inspect the condition of the weather stripping and replace any damaged or worn sections. This simple task contributes to energy efficiency and a cleaner garage interior.
Sub-Heading 9: Cleaning and Testing Remote Controls
Garage door opener remote controls can accumulate dirt and grime over time. Clean the remote control’s buttons and surface using a gentle cleaner or disinfectant wipe. Test the remote’s functionality by standing at various distances to ensure reliable operation.
Sub-Heading 10: Conclusion – DIY Care for a Reliable Garage Door Opener
Regular DIY maintenance is key to keeping your garage door opener in top condition. For more detailed guidance on how to clean and maintain a garage door opener yourself, visit mimimises.org. By following these simple yet effective steps, you’ll enhance the longevity and reliability of your garage door opener, providing convenience and peace of mind.