
Maximizing Energy Efficiency: DIY Weatherstripping for Doors and Windows
Drafty doors and windows can significantly impact your home’s energy efficiency, leading to increased heating and cooling costs. Fortunately, weatherstripping is a simple and cost-effective DIY solution to seal gaps and improve insulation. In this article, we’ll guide you through the process of weatherstripping doors and windows yourself, enhancing comfort and reducing energy bills.
Understanding the Importance of Weatherstripping
Weatherstripping is a crucial component of home maintenance that often goes overlooked. It involves sealing gaps around doors and windows to prevent drafts, which helps maintain a comfortable indoor temperature and reduces the workload on your heating and cooling systems. Proper weatherstripping can lead to significant energy savings over time.
Identifying Air Leaks
Before you begin weatherstripping, it’s essential to identify air leaks around doors and windows. On a windy day, feel for drafts around the edges of doors and windows. Alternatively, use a candle or incense stick to detect subtle air movements. Mark areas where drafts are noticeable, as these are the spots that require weatherstripping.
Choosing the Right Weatherstripping Material
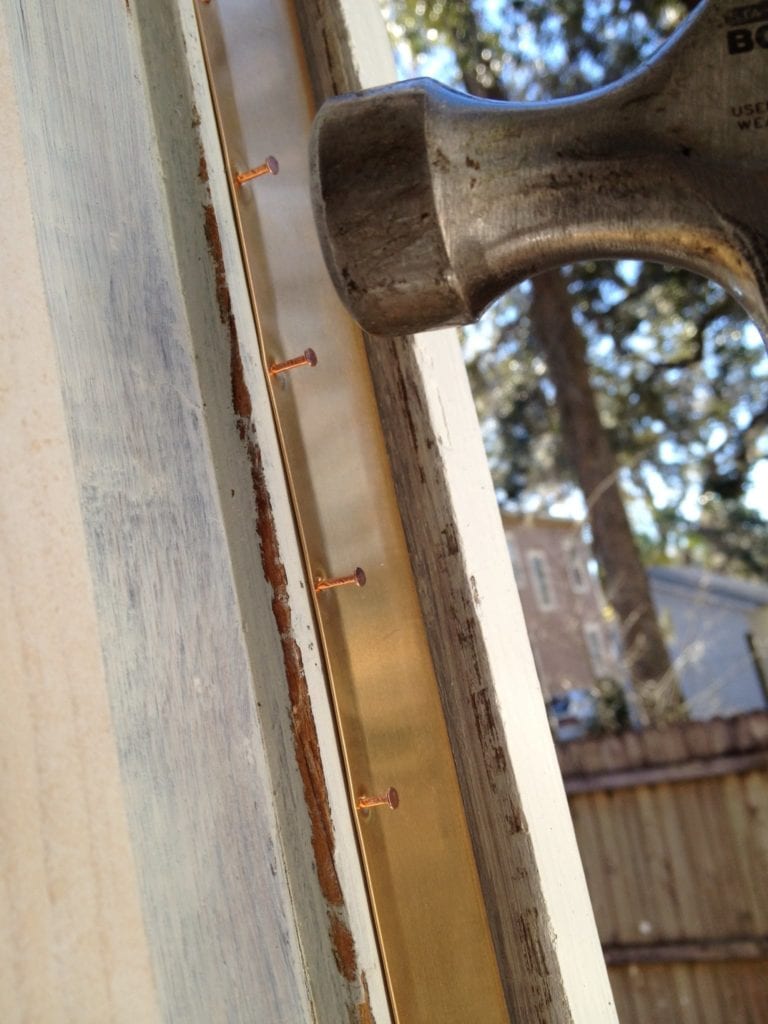
There are various types of weatherstripping materials available, each suitable for specific applications. Common options include adhesive-backed foam tape, V-strip, door sweeps, and silicone or rubber gaskets. Choose a material that matches the needs of the specific area you are weatherstripping. Adhesive-backed foam tape, for instance, is effective for sealing gaps around windows.
Weatherstripping Doors: Step-by-Step Guide
Step 1: Clean the Surface
Before applying weatherstripping, ensure the surface is clean and free of dust or debris. Use a mild detergent to clean the door frame and allow it to dry thoroughly.
Step 2: Measure and Cut
Measure the length of the sides and top of the door frame. Cut the weatherstripping material to the appropriate lengths using scissors or a utility knife.
Step 3: Apply the Weatherstripping
Peel off the backing of the adhesive-backed foam tape and apply it along the sides and top of the door frame, ensuring a snug fit. Press down firmly to secure the tape in place.
Step 4: Install a Door Sweep
To seal the gap at the bottom of the door, install a door sweep. Measure the width of the door and cut the sweep to fit. Attach it to the bottom of the door using screws or the provided adhesive.
Weatherstripping Windows: Step-by-Step Guide
Step 1: Clean the Window Frame
Clean the window frame thoroughly to remove any dirt or debris. A clean surface ensures better adhesion for the weatherstripping material.
Step 2: Measure and Cut
Measure the length of each side of the window frame and cut the weatherstripping material accordingly. Ensure a precise fit for optimal effectiveness.
Step 3: Apply the Weatherstripping
Peel off the backing of the adhesive-backed foam tape and affix it along the sides of the window frame. Press down firmly to secure the tape in place. Repeat the process for the top of the window.
Testing and Maintaining Weatherstripping
After weatherstripping doors and windows, conduct a thorough test to ensure the gaps are effectively sealed. Use the candle or incense stick method to detect any remaining drafts. Regularly inspect and replace weatherstripping as needed to maintain its effectiveness over time.
Additional Tips for Enhanced Energy Efficiency
Consider installing heavy curtains or blinds to further reduce heat transfer through windows. These window coverings act as an additional barrier, especially during extreme weather conditions. Additionally, addressing other aspects of home insulation, such as attic and basement insulation, complements the impact of weatherstripping.
Weatherstrip Doors and Windows Yourself: A Comprehensive Resource
For more detailed information on weatherstripping doors and windows yourself, visit mimimises.org. Explore comprehensive resources to empower you in maximizing energy efficiency through DIY weatherstripping, reducing drafts, and creating a more comfortable home environment.
In conclusion, weatherstripping doors and windows is a simple yet effective DIY solution for improving energy efficiency. By following these steps and regularly maintaining weatherstripping, you can enhance comfort, reduce energy costs, and contribute to a more sustainable and eco-friendly home.