
Introduction:
Revitalizing the exterior of your home is made easy with a DIY power wash. In this guide, we’ll explore the step-by-step process of power washing exterior siding, helping you enhance your home’s curb appeal and maintain its overall appearance.
Understanding the Importance of Power Washing:
Over time, your home’s exterior siding can accumulate dirt, grime, mold, and mildew, diminishing its visual appeal. Power washing is a highly effective way to remove these contaminants and restore the original luster of your siding. This process not only enhances the aesthetics but also contributes to the longevity of your home’s exterior.
Gathering the Necessary Equipment:
Before starting the power washing process, gather the necessary equipment. You’ll need a pressure washer, a cleaning solution suitable for your siding material, safety gear including goggles and gloves, and a ladder if your home has multiple stories. Having the right tools ensures a safe and efficient power washing experience.
Inspecting and Repairing Damaged Siding:
Before power washing, conduct a thorough inspection of your siding. Look for any loose or damaged sections. Repair or replace these areas before proceeding with the power wash to prevent water infiltration and potential damage. Ensure that all windows and doors are securely closed to prevent water seepage into the home.
Applying a Suitable Cleaning Solution:
Select a cleaning solution designed for your specific siding material. Whether it’s vinyl, wood, or another type, using the right cleaning solution ensures optimal results without causing damage. Apply the cleaning solution evenly to the siding using a low-pressure setting on the pressure washer, allowing it to penetrate and loosen the dirt and grime.
Setting Up the Pressure Washer:
Adjust the pressure washer settings according to the type of siding and the cleaning solution used. Start with a lower pressure setting, especially for delicate siding materials, and gradually increase if necessary. Test a small inconspicuous area first to ensure the pressure is appropriate and won’t cause damage.
Performing a Test Spot:
Before proceeding with the entire exterior, perform a test spot on a less visible section of the siding. This allows you to gauge the effectiveness of the pressure washer and ensure there are no adverse effects. Adjust settings or switch cleaning solutions if needed before tackling the entire surface.
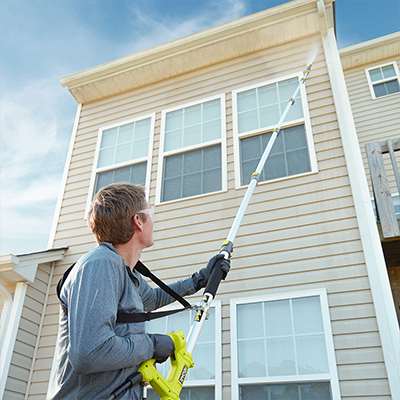
Executing the Power Wash:
Once satisfied with the test spot, begin the power washing process. Work methodically, starting from the top and moving downward to prevent streaking. Keep the nozzle at a consistent distance from the siding, usually around 6 to 12 inches, to maintain an even and effective cleaning process. Pay extra attention to areas with stubborn stains or mold growth.
Rinsing Thoroughly:
After completing the power wash, thoroughly rinse the siding to remove any residual cleaning solution and debris. Use a lower-pressure setting for the rinse to ensure all soap and contaminants are washed away. Proper rinsing is crucial to prevent streaks and residue on the siding.
Drying and Inspecting the Results:
Allow the siding to dry completely before inspecting the results. Admire the refreshed appearance of your home’s exterior. Take this opportunity to check for any areas that may require additional attention or touch-ups. Ensure that all windows, doors, and electrical outlets are dry and free from water infiltration.
Maintaining a Regular Power Washing Schedule:
To preserve the cleanliness and appearance of your siding, consider establishing a regular power washing schedule. Depending on your location and climate, an annual or biannual power wash can prevent the buildup of dirt, mold, and mildew, keeping your home’s exterior in top condition.
In conclusion, a DIY power wash is a highly effective method for revitalizing the exterior siding of your home. By following these steps and incorporating regular maintenance, you can enhance your home’s curb appeal and contribute to its long-term durability. For more detailed guidance and additional DIY tips, visit mimimises.org.