Introduction:
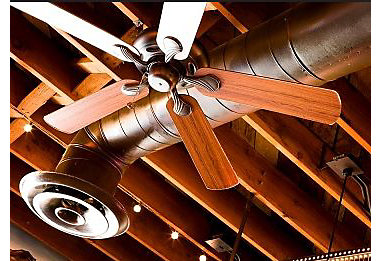
Bringing a cool breeze into your home is a practical and energy-efficient solution, and installing a ceiling fan is a rewarding do-it-yourself (DIY) project. With the right tools and a step-by-step approach, you can enhance both the comfort and aesthetics of your living spaces. In this guide, we’ll take you through the process of installing a DIY ceiling fan, ensuring a refreshing upgrade for your home.
Choosing the Right Ceiling Fan:
Before embarking on the installation, selecting the right ceiling fan for your space is crucial. Consider factors such as room size, ceiling height, and design preferences. Opt for a fan with adjustable speed settings and reversible blades for both summer and winter use. Measure the space to determine the appropriate fan size.
Gathering Necessary Tools and Materials:
Ensure you have all the necessary tools and materials before starting the installation process. Typical tools include a ladder, screwdrivers, pliers, wire stripper, and a voltage tester. The ceiling fan kit should include the fan motor, blades, mounting hardware, and an installation manual. Safety gear such as goggles and gloves is also essential.
Checking Electrical Compatibility:
Ceiling fans require proper electrical wiring for safe and effective operation. Confirm that your ceiling has a suitable electrical box rated for fan installation. If not, you may need to replace the existing box with a ceiling fan-rated electrical box. Turn off the power to the circuit at the breaker box before proceeding.
Preparing the Ceiling and Mounting Bracket:
Follow the manufacturer’s instructions to install the mounting bracket on the ceiling. This bracket provides a secure anchor for the fan. Ensure the bracket is firmly attached to the ceiling joist or an acceptable support structure. If installing on a sloped ceiling, use a sloped-ceiling adapter.
Assembling the Ceiling Fan:
Assemble the ceiling fan according to the manufacturer’s guidelines. Attach the fan blades to the motor housing, ensuring they are evenly spaced. Secure the blades with the provided screws. Most ceiling fans include a balancing kit to ensure smooth and wobble-free operation.
Connecting the Wiring:
Carefully follow the wiring instructions provided in the installation manual. Connect the fan wires to the corresponding wires in the ceiling, matching colors. Typically, these connections include black to black (hot), white to white (neutral), and green or bare wire to the grounding system. Use wire connectors to secure the connections.
Mounting the Ceiling Fan:
With the wiring complete, lift the assembled fan and attach it to the mounting bracket. Align the holes in the fan canopy with the screws on the bracket and secure them tightly. Double-check that the fan is securely attached to prevent any wobbling during operation.
Attaching Fan Blades and Finishing Touches:
Attach the fan blades to the motor housing using the provided screws. Ensure each blade is tightened securely to maintain balance. Once the blades are attached, install any additional features such as light kits or decorative covers, following the manufacturer’s instructions.
Testing the Ceiling Fan:
Before restoring power, test the ceiling fan to ensure it operates correctly. Turn on the fan and check for any wobbling, unusual noises, or vibrations. If necessary, use the balancing kit provided to correct any imbalances. Once satisfied with the fan’s performance, turn it off and restore power at the breaker box.
Adding Remote Control or Wall Switch (Optional):
For added convenience, consider installing a remote control or wall switch to operate the ceiling fan. Follow the manufacturer’s instructions for these optional features. Remote controls provide easy access to fan speed, direction, and light settings from anywhere in the room.
Conclusion:
Installing a DIY ceiling fan not only improves air circulation but also enhances the overall comfort and style of your home. By carefully following these step-by-step instructions and safety precautions, you can successfully complete the installation and enjoy the cool breezes in your living spaces. For more home improvement ideas and DIY projects, visit DIY install a DIY ceiling fan and discover a world of possibilities for your home.

