Introduction:
Maintaining your water heater is crucial for its efficiency and longevity. One essential task is draining and flushing the water heater regularly. This DIY maintenance guide will walk you through the process, ensuring that you can perform this essential task on your own, saving both time and money.
Understanding the Importance of Draining and Flushing:
Over time, sediment buildup occurs in your water heater tank, consisting of minerals and debris. This sediment can lead to reduced heating efficiency, increased energy consumption, and even damage to the heater. Regularly draining and flushing the water heater helps eliminate this sediment, improving its overall performance.
Gathering the Necessary Tools and Materials:
Before starting the draining and flushing process, gather the necessary tools and materials. You will need a garden hose, a screwdriver, a bucket, and safety gear such as gloves and safety glasses. Ensure that you have a clear understanding of your water heater’s type and model to follow specific guidelines.
Turning Off the Water Heater:
Begin by turning off the water heater. For gas water heaters, set the control knob to the pilot position. For electric water heaters, switch off the circuit breaker. Shut off the cold water supply valve that feeds water into the tank.
Connecting the Garden Hose:
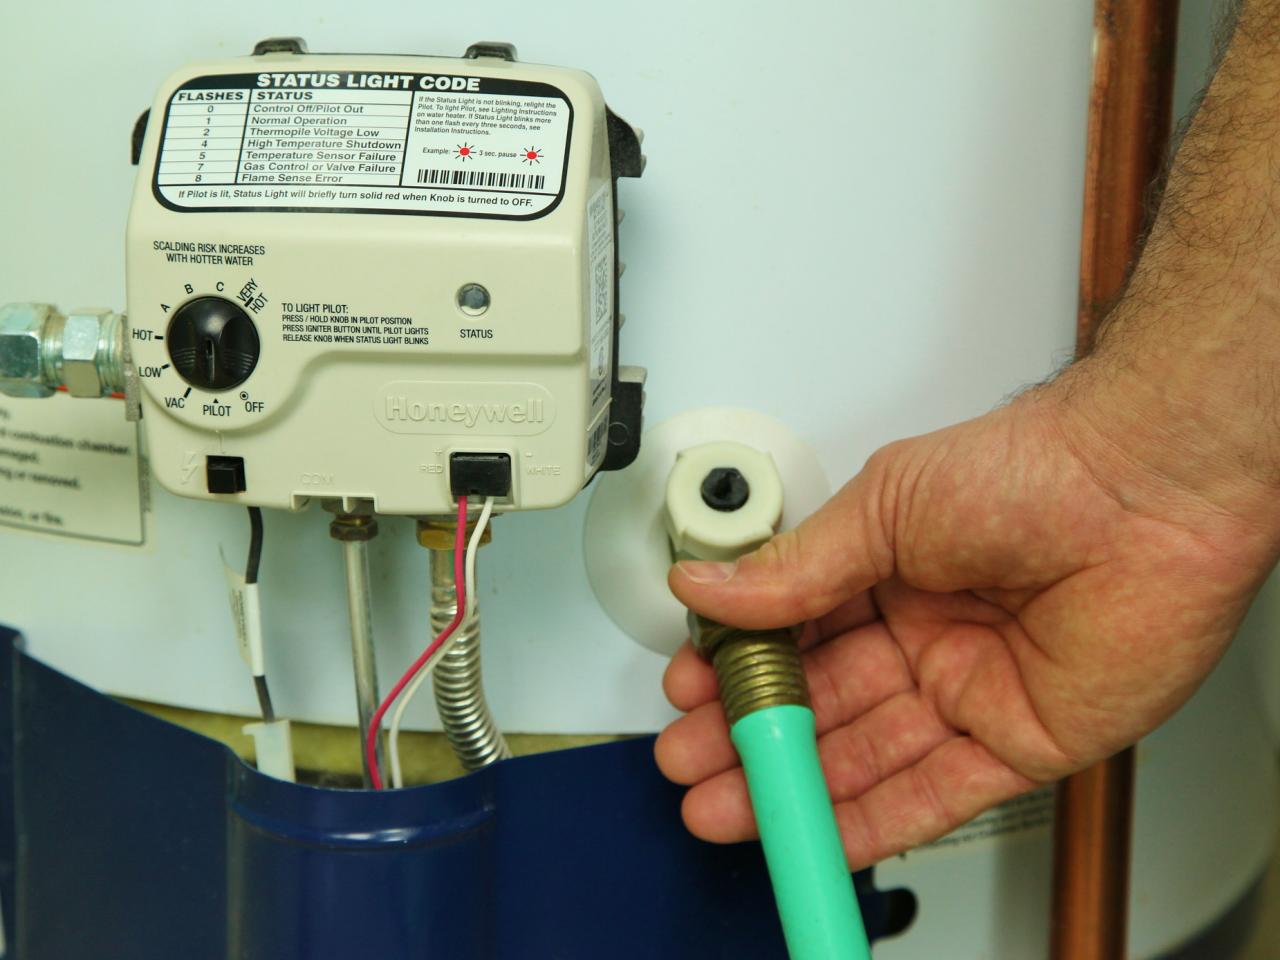
Attach one end of the garden hose to the drain valve located at the bottom of the water heater. Place the other end of the hose in a suitable drainage area, like a floor drain, utility sink, or outside where it won’t cause any damage.
Draining the Water Heater:
Open the pressure relief valve and then open the drain valve. Allow the water to flow out through the garden hose. Be cautious as the water may be hot. If the sediment is excessive, the water may appear discolored initially. Continue draining until the water runs clear, indicating that most of the sediment has been flushed out.
Flushing the Tank:
Once the water heater is drained, close the drain valve and disconnect the garden hose. Turn on the cold water supply valve to allow fresh water to fill the tank. This process helps flush out any remaining sediment. Keep the pressure relief valve open until a steady flow of water comes out, ensuring the air is purged from the tank.
Checking the Anode Rod:
As part of the maintenance process, it’s a good idea to check the condition of the anode rod. This sacrificial rod helps prevent corrosion within the tank. If the rod is heavily corroded, consider replacing it. Access the anode rod through the hot water outlet on top of the tank.
Closing the Water Heater:
Once the tank is flushed and the anode rod is checked, close the pressure relief valve. For gas water heaters, relight the pilot according to the manufacturer’s instructions. For electric water heaters, switch the circuit breaker back on. Allow the water heater to heat the water to the desired temperature before using hot water.
Performing Regular Maintenance:
To maintain optimal performance, make draining and flushing your water heater a regular part of your home maintenance routine. The frequency depends on factors like water hardness and usage, but it’s generally recommended to do this annually.
Conclusion:
Draining and flushing your water heater is a DIY task that can have a significant impact on its efficiency and lifespan. By following this step-by-step guide, you can perform this essential maintenance task on your own, ensuring that your water heater continues to provide reliable hot water for your household. For a comprehensive guide on how to drain and flush a water heater on your own, visit mimimises.org. This resource offers additional insights and detailed instructions to help you maintain your water heater effectively.
