
Revamp Your Home’s Exterior: DIY Repainting Guide
Revitalizing the exterior of your home with a fresh coat of paint is a rewarding DIY project. In this comprehensive guide, we’ll walk you through the steps to repaint the exterior of your home yourself, transforming its curb appeal and protecting it from the elements.
Choosing the Right Paint and Color Scheme
The first step in any successful painting project is choosing the right paint and color scheme. Opt for high-quality exterior paint that provides durability and weather resistance. Consider the architectural style of your home and the surrounding environment when selecting colors. A harmonious color scheme enhances curb appeal while expressing your personal style.
Inspecting and Preparing the Exterior Surface
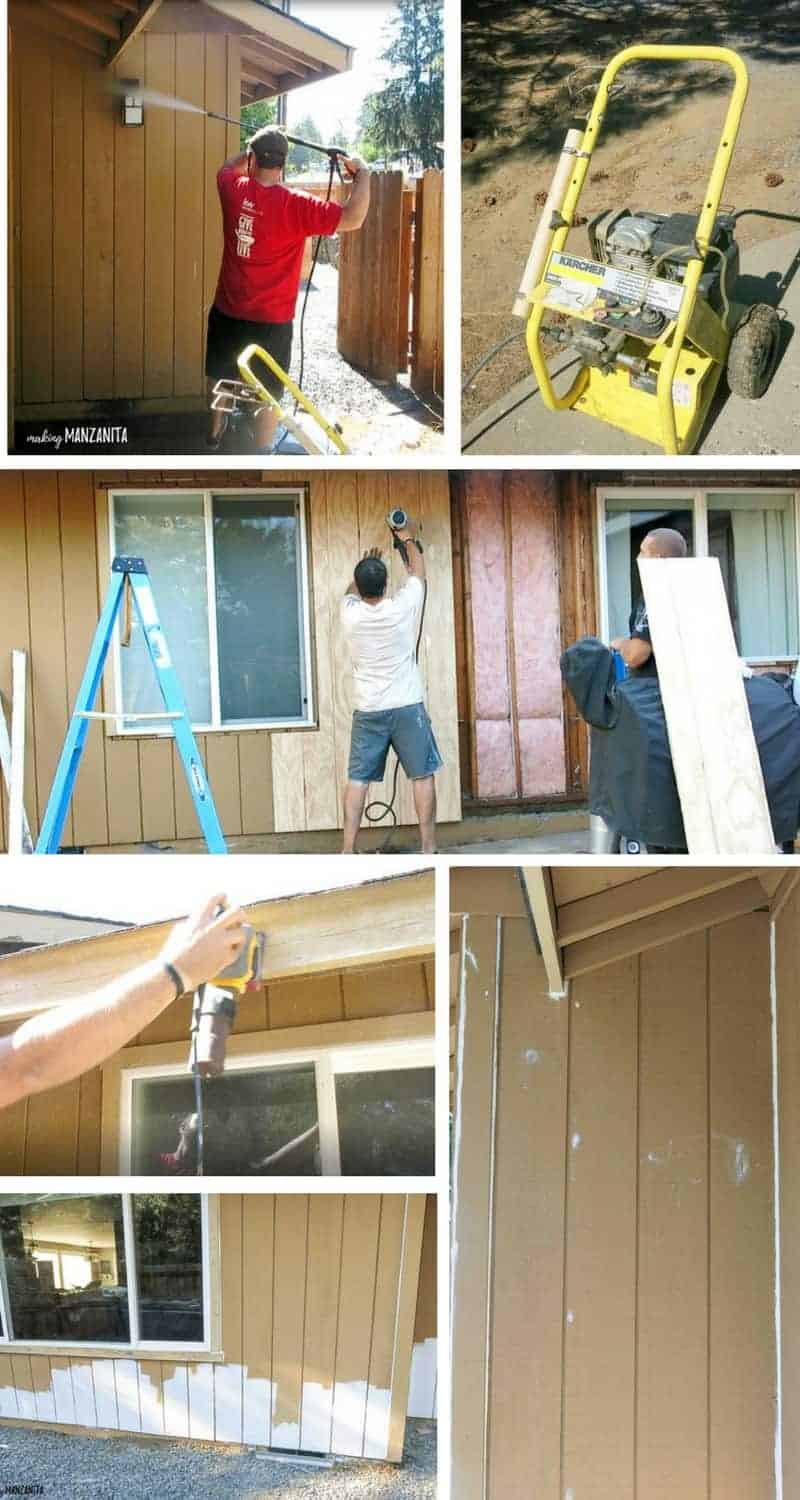
Before diving into painting, inspect the exterior surface for any signs of damage or wear. Repair cracks, holes, or peeling paint with appropriate fillers. Clean the surface thoroughly by power washing to remove dirt, mildew, and loose paint. Allow the surface to dry completely before proceeding to ensure proper paint adhesion.
Protecting Windows, Doors, and Other Surfaces
Proper preparation includes protecting areas not intended for painting. Cover windows, doors, trim, and other surfaces with painter’s tape and drop cloths. This step prevents accidental splatter or drips on areas you don’t want to paint. Take the time to ensure a neat and tidy workspace before applying the first stroke.
Choosing the Right Painting Tools
Investing in quality painting tools is essential for achieving a professional finish. Use a sturdy ladder, paintbrushes, rollers, and paint trays appropriate for the project. Consider the type of surface you’re painting – textured surfaces may require specific rollers, while intricate details may call for smaller brushes. Having the right tools ensures efficiency and precision.
Applying Primer for a Solid Foundation
Priming is a crucial step in exterior painting, providing a solid foundation for the topcoat. Apply a high-quality exterior primer to seal the surface and enhance paint adhesion. This step is especially important when dealing with bare wood, metal, or surfaces with extensive repairs. Allow the primer to dry thoroughly before moving on to the next phase.
Choosing the Right Weather Conditions
Timing is key when repainting the exterior of your home. Select a period with mild temperatures and low humidity to ensure optimal paint drying conditions. Avoid painting in extreme heat or direct sunlight, as this can cause the paint to dry too quickly and result in uneven coverage. Plan your project during a stretch of favorable weather for the best results.
Applying the Topcoat with Precision
Once the primer is dry, it’s time to apply the topcoat. Use a high-quality exterior paint that complements your chosen color scheme. Begin with broad surfaces like walls and siding, using a roller for even coverage. Use a paintbrush for detailed areas and trim. Apply two coats if necessary, allowing each coat to dry completely before adding the next.
Taking Breaks and Staying Hydrated
Exterior painting is physically demanding, so it’s essential to take breaks and stay hydrated throughout the process. Pace yourself to maintain focus and avoid fatigue. Consider the weather conditions – if it’s particularly hot, plan your work during the cooler parts of the day. Staying energized ensures a safer and more enjoyable painting experience.
Inspecting and Touching Up
After completing the painting process, conduct a thorough inspection of your work. Look for areas that may need touch-ups or additional coats. Pay attention to corners, edges, and any intricate details that may require extra care. Addressing these details ensures a polished and professional-looking finish.
Cleaning Up and Properly Disposing of Materials
Proper cleanup is the final step in your DIY exterior painting project. Clean your brushes, rollers, and other tools according to the manufacturer’s instructions. Dispose of paint cans and other materials responsibly, following local regulations. A tidy cleanup ensures the longevity of your painting tools and minimizes environmental impact.
Admire Your Transformed Home
With the final coat applied and cleanup complete, take a moment to step back and admire your transformed home. The effort you put into repainting the exterior has not only enhanced its visual appeal but also provided protection against the elements. Stand back and appreciate the renewed beauty of your home’s exterior.
For more detailed guidance on repainting the exterior of your home yourself, visit mimimises.org for expert tips and additional resources.
