
Introduction:
Tiles can add beauty and functionality to any space, but a broken tile can disrupt the aesthetic. The good news is that replacing a broken tile is a manageable do-it-yourself (DIY) project that doesn’t require extensive expertise. In this guide, we’ll take you through the steps to seamlessly replace a broken tile and restore the elegance of your surfaces.
Assessing the Damage:
Before diving into the replacement process, assess the extent of the damage. Determine whether the broken tile is a standalone issue or part of a larger problem. Identify any loose grout or adjacent tiles that may be compromised. Understanding the scope of the damage helps you plan a comprehensive solution.
Gathering the Necessary Tools and Materials:
To replace a broken tile, you’ll need specific tools and materials. Gather a grout saw, a chisel or putty knife, a hammer, a replacement tile, tile adhesive, and grout. Having these items on hand ensures a smooth and efficient replacement process. Safety gear such as goggles and gloves is also essential.
Removing the Broken Tile:
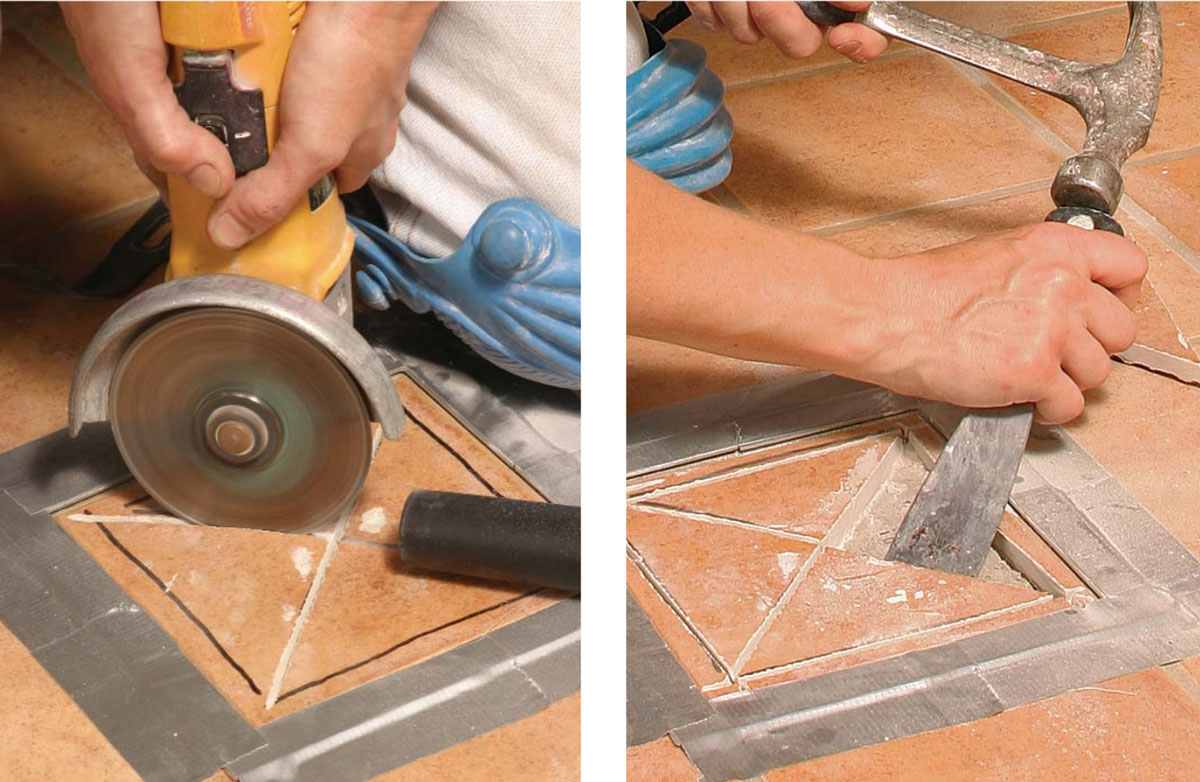
Carefully remove the broken tile by using a grout saw to cut through the grout surrounding it. Be cautious not to damage adjacent tiles. Once the grout is removed, use a chisel or putty knife to carefully pry the broken tile away from the adhesive beneath. Dispose of the broken tile responsibly.
Cleaning the Substrate:
After removing the broken tile, clean the substrate thoroughly. Scrape away any remaining adhesive, and ensure the surface is smooth and free of debris. A clean substrate ensures proper adhesion for the new tile.
Choosing a Replacement Tile:
Select a replacement tile that matches the size, color, and pattern of the existing tiles. If the original tile is no longer available, consider removing a less visible tile from a hidden area, such as under a cabinet, and using it as the replacement. This ensures a cohesive look.
Applying Tile Adhesive:
Using a suitable tile adhesive, apply a thin layer to the back of the replacement tile. Press the tile firmly onto the cleaned substrate, ensuring it aligns with the surrounding tiles. Wipe away any excess adhesive immediately to prevent it from drying on the tile surface.
Allowing Adhesive to Set:
Allow the tile adhesive to set according to the manufacturer’s instructions. This typically involves a waiting period of at least 24 hours. Avoid putting pressure on the newly replaced tile during this time to ensure a strong bond.
Grouting the Replacement Tile:
Once the adhesive has set, mix the grout according to the package instructions. Apply the grout to the gaps around the replacement tile, ensuring it fills the spaces evenly. Wipe away excess grout with a damp sponge, and allow it to cure.
Cleaning and Sealing:
After the grout has dried, clean the surface of the tiles with a soft cloth to remove any remaining grout residue. Consider applying a tile sealer to protect the grout and tiles from moisture and stains. Follow the sealer’s instructions for optimal results.
Inspecting Surrounding Tiles:
Take the opportunity to inspect the grout and surrounding tiles. If you notice any loose or damaged tiles, address them promptly to prevent further issues. Regular maintenance ensures the longevity and appearance of your tiled surfaces.
Conclusion:
Replacing a broken tile is a DIY project that can rejuvenate the look of your floors or walls. By following these steps and paying attention to details, you can seamlessly replace a broken tile and maintain the beauty of your tiled surfaces. For more DIY tips and inspiration, visit DIY replace a broken tile and elevate your tile repair skills.
