
DIY Guide: Clean and Maintain Your Garage Door Opener
Garage door openers play a crucial role in the convenience and functionality of our homes. Learn how to clean and maintain your garage door opener with this comprehensive do-it-yourself guide, ensuring smooth operation and longevity.
Understanding the Importance of Maintenance
Maintaining your garage door opener is essential for its proper functioning and longevity. Regular maintenance not only ensures smooth operation but also prevents unexpected breakdowns, saving you time and money in potential repairs.
Inspecting for Wear and Tear
Start your DIY maintenance routine by inspecting the garage door opener for any signs of wear and tear. Check the chains, belts, and other moving parts for fraying or damage. Identifying issues early allows for prompt repairs, preventing more significant problems down the line.
Cleaning the Exterior and Moving Parts
Dust and debris can accumulate on the exterior and moving parts of your garage door opener, affecting its performance. Use a soft cloth or a brush to clean the exterior surfaces, removing dirt and cobwebs. Wipe down the chains or belts with a damp cloth to ensure smooth movement.
Lubricating Moving Components
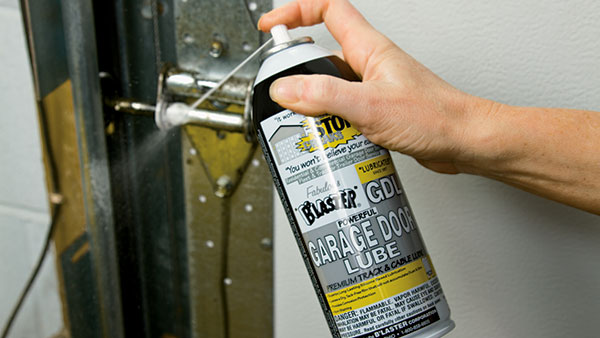
Proper lubrication is crucial for the smooth operation of your garage door opener. Apply a silicone-based lubricant to the chains, belts, and rollers to reduce friction. Be sure to follow the manufacturer’s recommendations for lubrication frequency and use the appropriate type of lubricant.
Checking and Adjusting the Photo Eyes
Most modern garage door openers are equipped with photo eyes, which are safety sensors that prevent the door from closing if an obstruction is detected. Ensure these sensors are aligned properly by checking the indicator lights. If needed, adjust the sensors to maintain accurate alignment.
Testing and Adjusting the Auto-Reverse Feature
The auto-reverse feature is a safety mechanism that prevents the door from closing if it encounters an obstacle. Test this feature regularly by placing an object, like a block of wood, in the door’s path. If the door doesn’t reverse upon contact, adjust the sensitivity according to the manufacturer’s instructions.
Inspecting and Tightening Hardware
Over time, the vibration and movement of the garage door can cause hardware to loosen. Inspect all bolts and screws, including those on the tracks and brackets. Tighten any loose hardware to ensure the door operates securely and prevent unnecessary wear on the components.
Checking the Balance of the Door
A well-balanced garage door puts less strain on the opener and ensures smoother operation. Disconnect the opener and manually open the door halfway. If it stays in place, the door is balanced. If it moves up or down, it may be unbalanced, requiring adjustments to the springs or other components.
Testing Remote Controls and Keypads
If your garage door opener has remote controls or keypads, test their functionality regularly. Replace the batteries if needed and ensure that the devices are working correctly. This step ensures that you can rely on these accessories for convenient and secure access to your garage.
Updating and Upgrading Software
If your garage door opener is equipped with smart technology, check for software updates or firmware upgrades provided by the manufacturer. Keeping the software up-to-date ensures optimal performance and may introduce new features or improvements to your system.
Conclusion: A DIY Investment in Longevity
Regularly cleaning and maintaining your garage door opener is a DIY investment that pays off in the longevity and efficiency of your system. By following these simple steps, you contribute to the smooth operation of your garage door and enhance the safety and convenience of your home.
For more detailed information on how to clean and maintain a garage door opener yourself, visit mimimises.org for expert guidance and additional tips.
